Brilliant Smart Ceiling Fan Remote in Home Assistant
A few months ago I purchased a Brilliant Smart Ceiling Fan Remote or Controller, with the intention of flashing Tasmota on it, and setting it up in Home Assistant. I needed to replace a ceiling fan in our lounge room, and so I also bought a Brilliant Tempest II ceiling fan, which I understood should be compatible with the fan controller. You can see a few photos below, but unfortunately I forgot to take any before I had disassembled the parts, so you'll need to check out the BrilliantSmart product page to see photos before disassembly.
Here is the box...

And the control panel with the cover removed...

And the controller, also with the cover removed...

My friendly electrician then came the next day to install the fan controller (and a few other bits and pieces I'll write about in some other posts).

The next step was to get the fan controller working with Home Assistant. I started off just controlling the fan and light on/off state, and the light dimmer, but again, following advice from thecubical and exxalmate, I was able to derive a Home Assistant configuration that also allowed me to set and control fan speeds. You can see the entry in my configuration.yaml file below.
To explain this a bit further, dpId 3 is an enum data type which corresponds to the fan speed, and takes values of 0, 1 or 2, corresponding to low, medium and high speeds. To set the fan speed I configure Home Assistant to send a Backlog command which turns on the fan, and uses the TuyaSend4 command to send a value to dpId 3. Enabling SetOption66 in the Tasmota config means that every time the ESP8266 module receives a message from the MCU it gets published to a RESULT message via MQTT. So, to determine the state of the fan, Home Assistant listens to that RESULT message for a particular command that corresponds to setting of the different fan speeds, and then sets the speed value to the same payload that is passed to the Backlog command to set the fan speed. This is a slightly clumsy solution in that the payload is messy, but it seems to work okay and does not require any Tasmota rules.
This is how the fan looks in Home Assistant.

I have configured the light in Home Assistant as follows.
This configuration seems to work well. I can control the fan from Home Assistant, and Home Assistant is aware of state changes made using the remote control. In addition, the fan is exposed to Google Home and I can control the fan by voice control, or from Google Home devices. Unfortunately there seems to be a glitch with the Google Home app on my phone and fan control does not work properly from there. I can live with that for the time being.
Here is the box...

And the control panel with the cover removed...

And the controller, also with the cover removed...

Fortunately, thanks to some very helpful posts and investigative work from sparkydave, thecubical and exxalmate and posted on the Australia - Electrically Certified Hardware thread on the Home Assistant forums, I knew that this was a Tuya based device, with a secondary microcontroller unit (MCU). Fortunately the TuyaMCU functionality in Tasmota is improving all the time, making it easier to run Tasmota on these type of devices. The Brilliant wall switch I've experimented with previously also relies on a similar arrangement.
So, after removing the cover from the controller, I could see VCC and GND header holes on the main board. I supplied 3.3V by sticking DuPont cables into the header holes (without soldering) and powered it up. You can just see this in the image above. I started trying to flash it using tuya-convert but it wasn't working. I realised that I needed to supply power, and then press the small button on the side of the main board near the dip switches, in order to get the ESP8266 module into the right mode so that tuya-convert could work its magic. Unfortunately I can't recall whether it was a short or a long press.
I flashed with the most recent version of Tasmota at the time (7.1.1.1), configured WiFi and MQTT settings, and then set up the Tasmota configuration as follows.
 Module 54            # enable TuyaMCU module
 TuyaMCU 11,1         # set Switch1 (fnId 11) to dpId 1 (light on/off)
 TuyaMCU 12,9         # set Switch2 (fnId 12) to dpId 9 (fan on/off)
 TuyaMCU 21,10        # set Dimmer (fnId 21) to dpId 10 (light dimmer)
 DimmerRange 0,255    # set dimmer range
 SetOption59 1        # publish state via MQTT on power command
 SetOption66 1        # publish TuyaReceived via MQTT
My friendly electrician then came the next day to install the fan controller (and a few other bits and pieces I'll write about in some other posts).
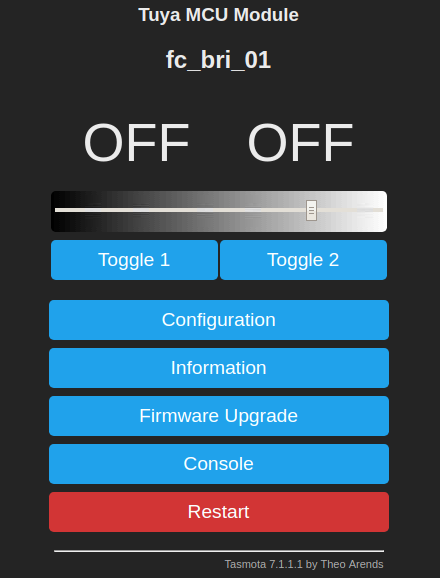
I was pleased to find that the remote control worked perfectly straight away, and I was able to control the above functions using the Tasmota WebUI, which you can see below.
 fan:
  - platform: mqtt
    name: "Fan Lounge"
    command_topic: "cmnd/fc_bri_01/POWER1"
    state_topic: "tele/fc_bri_01/STATE"
    state_value_template: "{{ value_json.POWER1 }}"
    speed_command_topic: "cmnd/fc_bri_01/Backlog"
    speed_state_topic: "tele/fc_bri_01/RESULT"
    speed_value_template: >
      {% if value_json.TuyaReceived.Data == "55AA03070005030400010016" %}
        Power1 1; TuyaSend4 3,0
      {% elif value_json.TuyaReceived.Data == "55AA03070005030400010117" %}
        Power1 1; TuyaSend4 3,1
      {% elif value_json.TuyaReceived.Data == "55AA03070005030400010218" %}
        Power1 1; TuyaSend4 3,2
      {% endif %}
    availability_topic: tele/fc_bri_01/LWT
    payload_available: Online
    payload_not_available: Offline
    payload_low_speed: "Power1 1; TuyaSend4 3,0"
    payload_medium_speed: "Power1 1; TuyaSend4 3,1"
    payload_high_speed: "Power1 1; TuyaSend4 3,2"
    payload_off: "OFF"
    payload_on: "ON"
    qos: 1
    retain: false
    speeds:
      - low
      - medium
      - high
To explain this a bit further, dpId 3 is an enum data type which corresponds to the fan speed, and takes values of 0, 1 or 2, corresponding to low, medium and high speeds. To set the fan speed I configure Home Assistant to send a Backlog command which turns on the fan, and uses the TuyaSend4 command to send a value to dpId 3. Enabling SetOption66 in the Tasmota config means that every time the ESP8266 module receives a message from the MCU it gets published to a RESULT message via MQTT. So, to determine the state of the fan, Home Assistant listens to that RESULT message for a particular command that corresponds to setting of the different fan speeds, and then sets the speed value to the same payload that is passed to the Backlog command to set the fan speed. This is a slightly clumsy solution in that the payload is messy, but it seems to work okay and does not require any Tasmota rules.
This is how the fan looks in Home Assistant.

I have configured the light in Home Assistant as follows.
 light
  - platform: mqtt
    name: "Light Lounge"
    command_topic: "cmnd/fc_bri_01/POWER2"
    state_topic: "tele/fc_bri_01/STATE"
    state_value_template: "{{value_json.POWER2}}"
    availability_topic: "tele/fc_bri_01/LWT"
    brightness_command_topic: "cmnd/fc_bri_01/Dimmer"
    brightness_state_topic: "tele/fc_bri_01/STATE"
    brightness_scale: 100
    on_command_type: "brightness"
    brightness_value_template: "{{value_json.Dimmer}}"
    payload_on: "ON"
    payload_off: "OFF"
    payload_available: "Online"
    payload_not_available: "Offline"
    qos: 1
    retain: false
This configuration seems to work well. I can control the fan from Home Assistant, and Home Assistant is aware of state changes made using the remote control. In addition, the fan is exposed to Google Home and I can control the fan by voice control, or from Google Home devices. Unfortunately there seems to be a glitch with the Google Home app on my phone and fan control does not work properly from there. I can live with that for the time being.


I had to change the state_topic to below to get the status to update in Home assistant.
ReplyDeletestate_topic: "stat/fc_bri_01/POWER1"
I figured this out by comparing a similar config at
https://neon.ninja/2019/12/taking-the-old-ceiling-fan-for-a-smart-spin/
Posting as other may find this useful....
Thanks mgguinne. I think there was a hangover from some earlier Tasmota settings I had applied, that meant the POWER1 switch on my fan controller was behaving strangely. I've reset the Tasmota configuration, and now it behaves the same as yours. I've updated the Home Assistant configuration for the fan in the blog post accordingly.
Delete
ReplyDeleteHave you heard of anyone trying to put Tasmota on the brilliant Smart LED Escort Security Light? It would be nice to have light and PIR info going into HA from one device.
No, sorry, I don't know. But this thread on the Home Assistant forum will probably be the place to find out, if you haven't tried it already.
Deletehttps://community.home-assistant.io/t/australia-electrically-certified-hardware/32074
Hi there, this is most helpful. But I am hoping you can point me in the right direction to get some assistance for the later model of this device. I have a BrilliantSmart 99333 Fan controller and there has been a hardware change in versions because the template now needs to use different GPIO for the TX/RX. The Tuya Rx and Tuya TX are now on GPIO13 and GPIO15 respectively.
ReplyDeleteI have been able to successfully get Tasmotta talking to the device, I can turn the light on and off and set the fan speed etc. but I am not able to read values off the MCU when I use the RF remote. I’m just wondering if you have any tricks that you used when you where first experimenting. I have added a post to Australia electrically certified hardware thread, you can find it here https://community.home-assistant.io/t/australia-electrically-certified-hardware/32074/2198
Hi Mate, I'm just diving into this now after my fan controllers have sat in a box for year... It's my first time with Tasmota so not sure how to get to the settings you have listed above. Any tips? I've set the module to 54 (tuya MCU) and set the TX / RX as per the details shown in the blog post by Neon_Ninja because I wasn't sure what else to do. I was actually hoping to use your settings. Where do go to set the dimmer, SetOptions etc?
ReplyDeleteI think I may have figured it out... used Google Chrome to send commands. Hopefully it worked
Deleteactually I think I have made a mess of the MQTT topics. Could you please let me know what you set them as in Tasmota?
DeleteHi there, missed your post. I control the fans either through the RF remote control, or the home assistant web UI, or via Google Home commands. The MQTT topic is defined by the Tasmota Topic command, or through the MQTT settings in the Tasmota web UI for the device.
DeleteAny idea if there is a way to change the speed settings? I find that 'low' is still too fast for our liking. Wondering if it's possible to change this given that we are able to modify the controller settings to a degree
ReplyDeleteHi, I have 8 of these controllers and I am not aware of anyway to change the speeds, it's all set in the hardware of the wifi controller. These integration is just telling the hardware to change the speed, in the same way as the remote would... Happy to hear if you have found a way though, as I do get complaints from family members that the low speed is a little too fast compared to the manual switch (before installing the wifi controller, which means point at wall just goes back to a standard switch.).
Deletehere's a handy tool to see what functions your fan controller supports
Deletecreate and click on the bookmarklet as per the instructions and it will prepopulate all the functions it can find, then you can go through each option turning them on and off to find out what they all do and use that to get all the settings for your controller
https://github.com/sillyfrog/Tasmota-Tuya-Helper
Any updates on how to set the speeds now that Home Assistant has depreciated the speeds method?
ReplyDeleteLove this blog. The topic is exactly what I am trying to do in HA with the same Brilliant Fan Controller. Would love to see an update as per mgguinne's comment above please?
DeleteSee posts on https://neon.ninja/2019/12/taking-the-old-ceiling-fan-for-a-smart-spin/
DeleteAlso a lot of comments on https://community.home-assistant.io/t/australia-electrically-certified-hardware/32074/4095?u=mgguinne
DeleteThanks mgguinne.
Delete