Posts

Showing posts with the label brilliant

Brilliant Smart Ceiling Fan Remote in Home Assistant

Image
A few months ago I purchased a Brilliant Smart Ceiling Fan Remote or Controller , with the intention of flashing Tasmota on it, and setting it up in Home Assistant . I needed to replace a ceiling fan in our lounge room, and so I also bought a Brilliant Tempest II ceiling fan , which I understood should be compatible with the fan controller. You can see a few photos below, but unfortunately I forgot to take any before I had disassembled the parts, so you'll need to check out the BrilliantSmart product page to see photos before disassembly. Here is the box... And the control panel with the cover removed... And the controller, also with the cover removed... Fortunately, thanks to some very   helpful   posts  and investigative work from sparkydave , thecubical and exxalmate  and posted on the  Australia - Electrically Certified Hardware thread  on the Home Assistant forums , I knew that this was a Tuya based device, with a secondary microco...

Brilliant WiFi A60 globes RGB+W (20699)

Image
After having some recent success with the Brilliant RGB+W 20741 E27 globes , I decided to purchase the B22 version of (what I thought) was the same globe, the Brilliant WiFi A60 RGB+W 20699 B22 globe . You can see some images of the globe and box here. I followed the same process as with the 20741, flashing Tasmota using  tuya-convert , and attempting to use the  template for the 20741 in the repository . The 20741 template uses the following pin assignment: GPIO4 - PWM1 - red GPIO12 -  PWM2 -   green GPIO14 -  PWM3 -   blue GPIO5 -  PWM4 -   warm white To test the globe, I then tried cycling through the following commands in the Tasmota console to light each led: red: Color1 1 green: Color1 2 blue: Color1 3 white: White 100 After this test, the only response I saw from the globe was the white led was lit when I tried to set the globe to a green colour. This told me the 20741 template wasn't correct for this globe, but...

Brilliant WiFi A60 globes RGB+W (20741)

Image
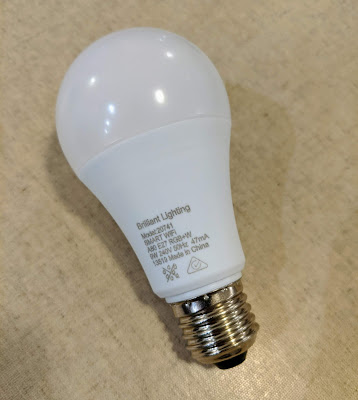
I picked up a 3-pack of these Brilliant WiFi A60 RGB+W E27 globes from Aldi recently (Model Number 20741), with the intention of flashing them with Tasmota  and doing some experimentation in Home Assistant . Firstly, some photos of the bulb and box. I was able to easily flash these with Tasmota easily using tuya-convert , and fortunately there was a template available in the repository , meaning they were also easy to configure.  These globes are controlled via four separate PWM signals for the red, green, blue and white leds. There were also very good instructions on the Tasmota wiki for configuring the globes in Home Assistant.

Brilliant Smart Elite Glass Wall Switches

Image
I purchased one of these Brilliant Smart Elite Wall Switches  which arrived today.  I quickly pulled off the front glass panel and could see the upper surface of the low voltage board.  Fortunately the low voltage board was easily removable, revealing the high-voltage board beneath. The low voltage board  containing the ESP8266 chip on the underside is below. T here were a set of header pins which extended into the mains voltage part that I hoped would offer an easy solution for flashing.   The ESP8266 in this case is on an TYW3ES module which I think is commonly used in Tuya gear. Looking at the TYW3ES data sheet  I was able to identify the pins on the module.  I then did some continuity checks with a multimeter and was able to identify the VCC and GND pins on the header, but unfortunately not the TX or RX pins. I connected the VCC and GND pins to a 3.3V power supply using dupont cables,...

Tasmota on Brilliant Smart Plug Without Soldering

Image
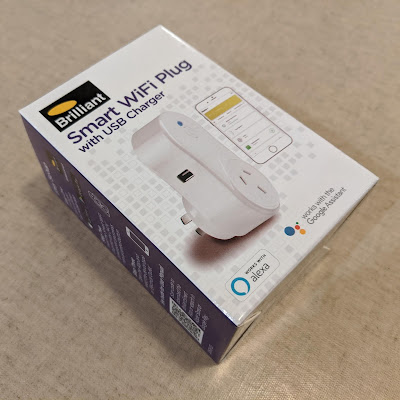
So, after successfully getting Tasmota running on some Sonoff S20 and S26 smart plugs  without soldering, and  without tuya-convert , I embarked up doing the same with some Brilliant Smart WiFi Plugs (Model 20676/05). I was keen to use these devices, as they are approved for use in Australia, having a Regulatory Compliance Mark (RCM) . The process I used involved disassembling the device, and using duPont cables held against the terminals on the ESP8266 module to establish a serial connection and flash the device. Here are some more details. The box for the plugs is shown below. And here are some images of the plug before disassembly. The cover of the smart plug can be removed by levering it up with a screwdriver or spudger or similar, and lifting it off. There are two screws that need to be removed from the main board in order to lift out the board and plug assembly. The board containing the ESP8266 module is attached to the main board. L...

Flashing smart plugs with tuya-convert FAIL

Image
I purchased a Medion Life+ Smart Plug from Aldi , for the purpose of doing some experimentation, and setting up a few automation ideas I had by connecting it to my Home Assistant instance . After getting it home, and doing a bit of I realised that these plugs were actually manufactured by Tuya , and were simply rebranded with the Aldi Medion brand. I found that there was a Tuya component for Home Assistant  that worked with the Tuya cloud, however upon doing some more reading, a more appealing solution emerged. I realised that many people were flashing Tuya based devices with custom firmware such as Tasmota  or ESPHome , which allowed local control of the devices over a local network using Home Assistant.  Usually flashing these devices means pulling them apart and using a USB-to-serial adaptor to flash the custom firmware. But, even more searching led me to tuya-convert which makes it possible to flash some Tuya-based devices over the air. So,...